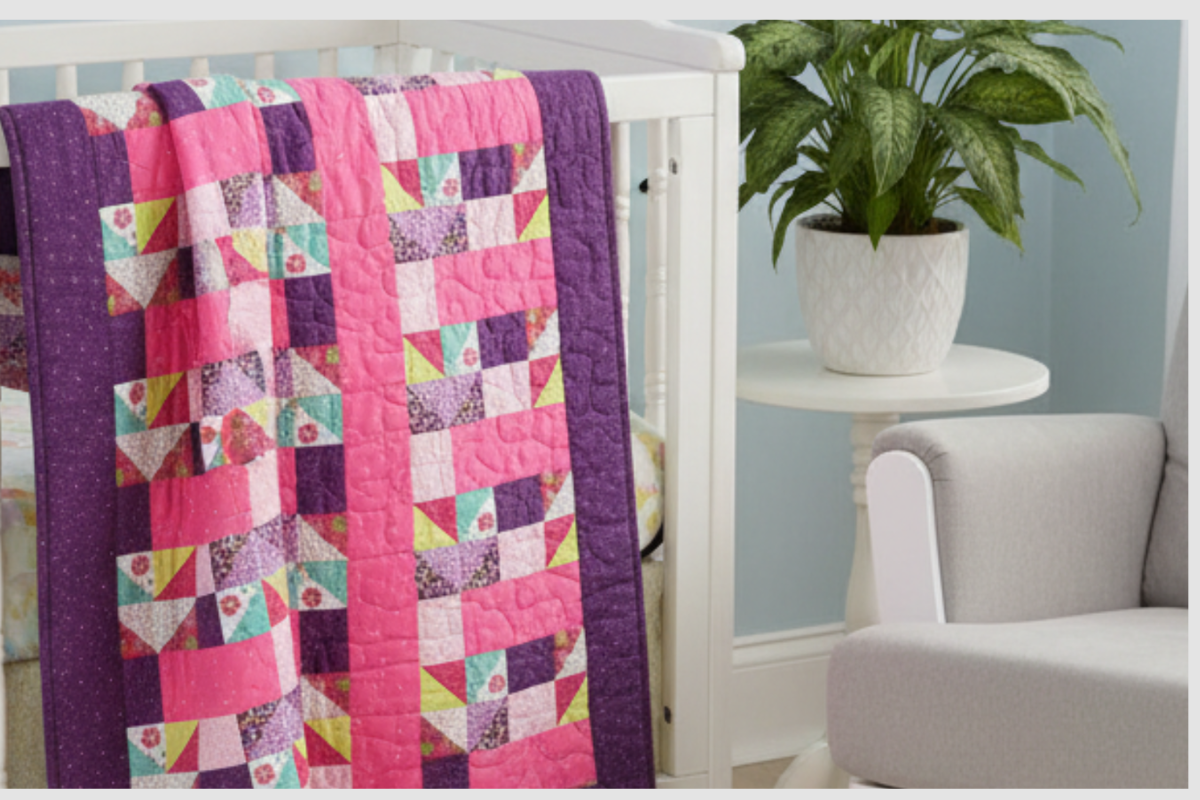
Easy Layer Cake Baby Quilt
You will love this easy layer cake baby quilt. There is a PDF that you can download in our Etsy store that has several quilt patterns along with cross stitch patterns.
Enter The monthly fabric giveaway. See the details
Table of Contents
PDF of Quilt Pattern
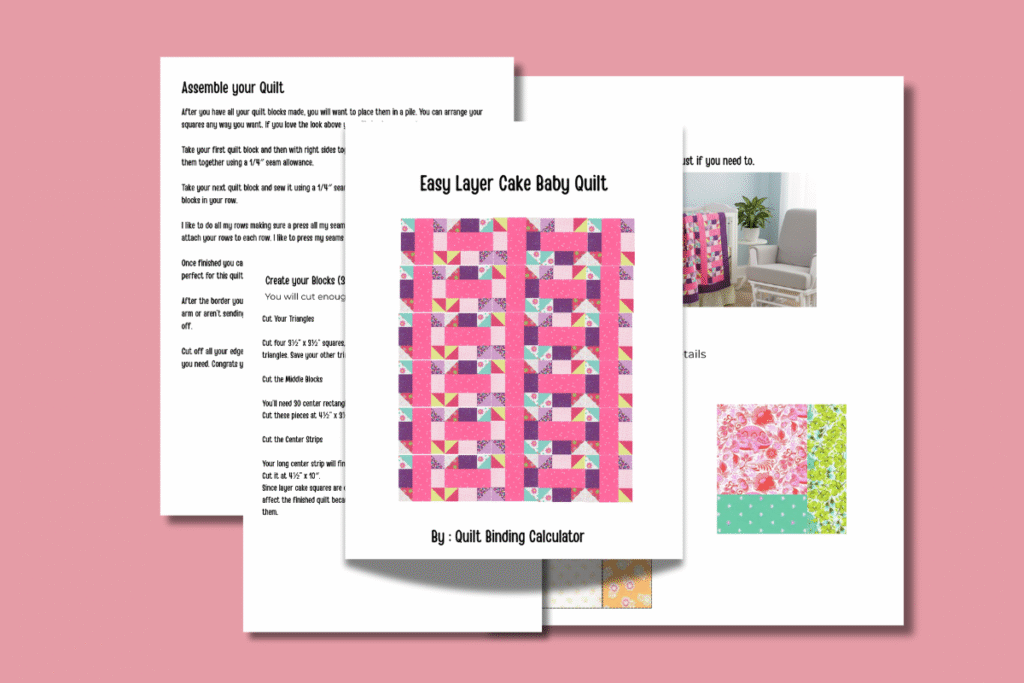
I created a PDF of the quilt so you don’t have to search high and low for the pattern. This also helps us make you free quilt patterns and our free app.
Cut Your Fabric

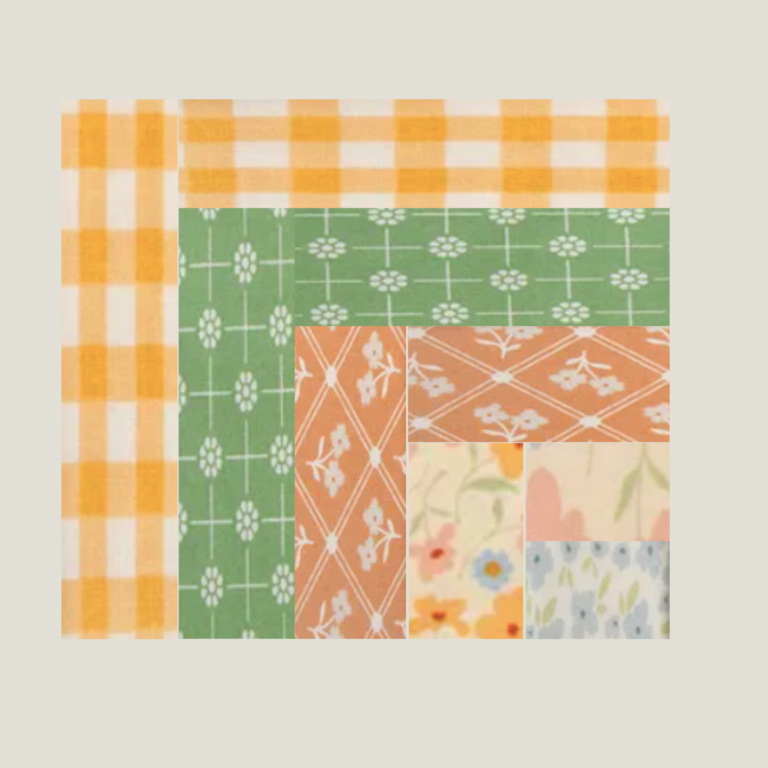
I used a cute layer cake bundle from The Fabric Store along with a coordinating solid, which you can easily swap for scraps from your stash. The measurements below are for one block, and I’ve also included other quilt size options further down.
1. Cut Your Triangles
Cut four 3½” x 3½” squares, then slice each square diagonally once to create triangles. You can save the leftover triangles for another project, or—if you’re making a full quilt with this layer cake baby block—set them aside to use in additional blocks.
2. Cut the Middle Blocks
You’ll need two center rectangles that will finish at 3″ x 4″.
Cut these pieces at 4½” x 3½”.
3. Cut the Center Strip
Your long center strip will finish at 4″ x 10″.
Cut it at 4½” x 10″.
Since layer cake squares are only 10″, your cut may be slightly shorter, but it won’t affect the finished quilt because you will simply adjust your rows before sewing them.
For a baby quilt, you will need 30 Quilt blocks finished.
Assemble your Easy Layer Cake Baby Quilt
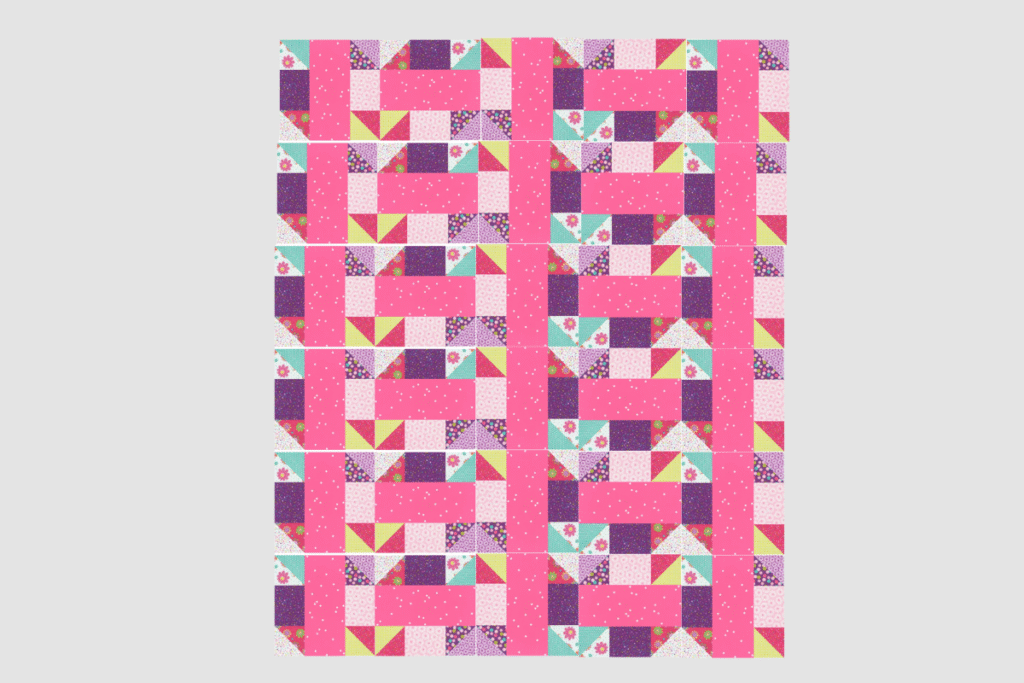
After you have all your quilt blocks made, you will want to place them in a pile. You can arrange your squares any way you want. If you love the look above you will simply sew row by row.
Take your first quilt block and then with right sides together, place your second quilt block down and sew them together using a 1/4″ seam allowance.
Take your next quilt block and sew it using a 1/4″ seam allowance. You will continue until you have 5 blocks in your row.
I like to do all my rows making sure a press all my seams flat. Once your rows are complete, go ahead and attach your rows to each row. I like to press my seams each time I sew.
Once finished you can straighten up your quilt. Then decide if you want to add a border. A 2-3″ border is perfect for this quilt.
After the border you want to add your backing and batting and finish your quilt. If you don’t have a long arm or aren’t sending it to a long arm, you can easy hand tie your quilt or use diagonal sewing to finish it off.
Cut off all your edges and add a binding. Don’t forget we have a calculator so you know how much fabric you need. Congrats your easy layer cake baby quilt is finished.